Support FAQ
Business Card Designer Pro Help
Support answers for card design, PDF/image export, alignment, back-side printing, templates, fonts, and print-shop output.
Yes. Use File > Save as Image or Export as PDF. Supported image formats include JPG, BMP, PNG, GIF, and TIF. Confirm the print layout, such as Avery 8371 or another card stock, before exporting.
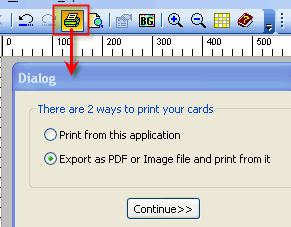
You can print directly from the application, or export the card layout as a PDF/image and print from that file. If a whole sheet prints slightly high or low, create a custom print layout and adjust the top margin by the same amount.
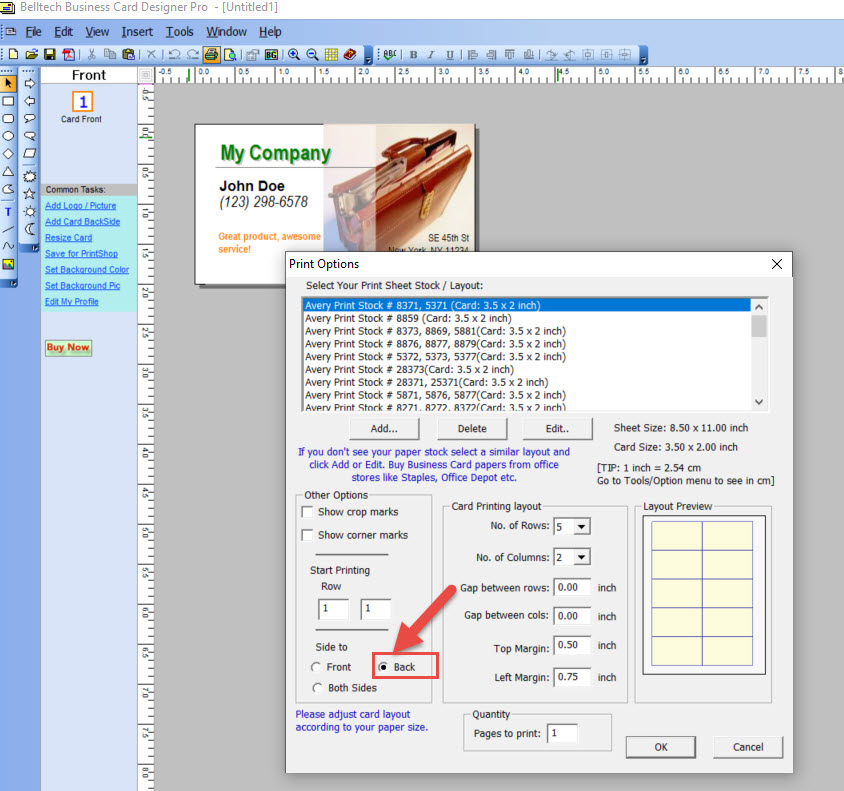
Open the card, then use Edit > Add backside of Card. Use the Back button to design the reverse side. To remove it, use Edit > Remove backside of Card.
If your printer supports duplex printing, select the Both Sides option in the print dialog. Otherwise, print the front side first, turn the sheet over, and print the back side.
The global shadow option may be turned off. Go to Tools > Options and choose a shadow length such as small, medium, or large. You can also set the shadow color there.
Yes. Click New, choose a blank document, select vertical orientation, or choose Other and enter a custom card size. You can also start from a vertical template when one fits your paper stock.
A background image may be covering the background color. Remove the background image if you want the selected background color to appear.
Save custom templates into the application's Templates folder. On many older installations this folder was inside the Belltech Business Card Designer Pro installation folder under Program Files.
Double-click the design element. The properties window will reopen so you can edit color, size, tilt angle, and related options.
Use File > Save As Image, then email the exported image. The recipient can view it in any normal image viewer.
The software reads fonts installed in Windows. Install the desired font in Windows first, then reopen the application if needed. TrueType fonts are generally the safest choice for these older products.
The element may be locked. Select it and click the unlock button on the toolbar before moving or resizing.
No. Move all needed design elements inside the card design area before printing or exporting.
JPG, BMP, GIF, WMF, PNG, and TIF are supported for imported graphics. If an image can be copied to the clipboard, you may also be able to paste it into the design.
Convert the file to BMP or another supported image format, then insert the converted file into your design.
Use standard business-card sheets from office supply stores. Avery-style papers are commonly supported. Always match the software layout to the exact paper stock.
Use the current available installer from the Download page, reinstall the application, then use File > Save As Image again.
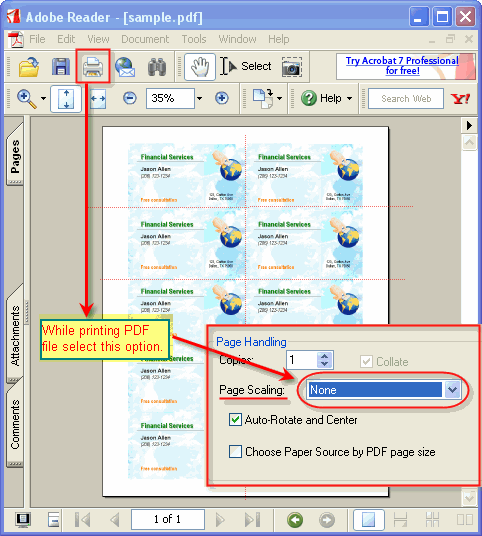
Design the card, then use File > Save As Image or Export as PDF. Choose a high-resolution option, up to 600 DPI where available, and take the resulting PDF, JPG, PNG, or BMP to the print shop.
Increase the size of the text box. The text may fit visually in the editor but still be too tight for printing, so give the text box a little more room.
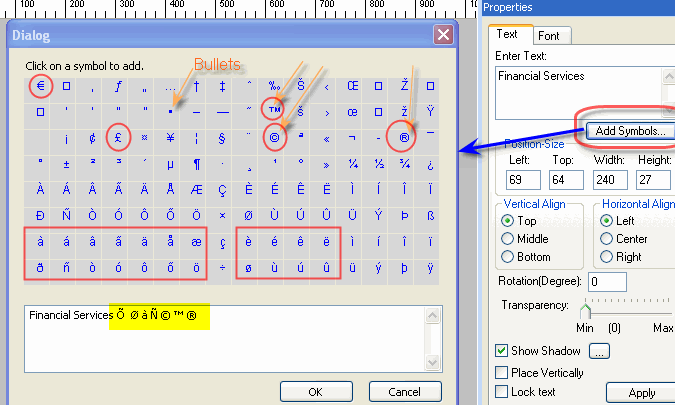
Use the Add Symbol button below the text entry box. You can also create bullet lists manually with circle, square, or diamond elements.
Click the element, then drag the dotted resize handles around it. This works for text, photos, boxes, lines, circles, and similar objects.