Back to Support

Business Card Designer Pro

Business Card Designer Pro Tutorials

Step-by-step guidance preserved from the classic Belltech tutorial pages.

These tutorials were created for classic Business Card Designer Pro. Some screens may show older versions or older Windows UI.
1

Business card basics

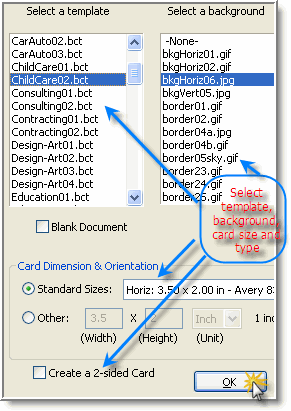
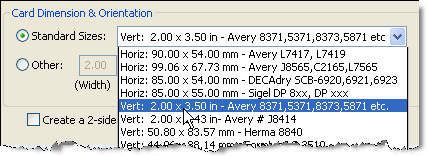
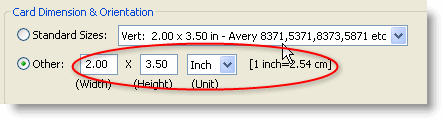
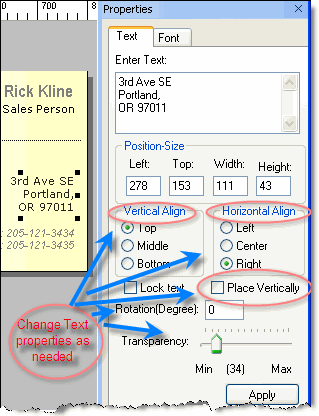
Business cards come in many sizes, orientations, and formats. They can be horizontal or vertical, one-sided or two-sided, and can be used for businesses, personal contact cards, clubs, stores, trade shows, or different job titles.

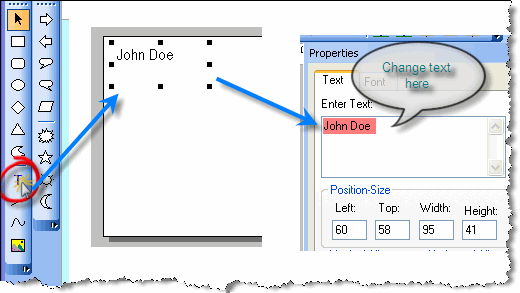
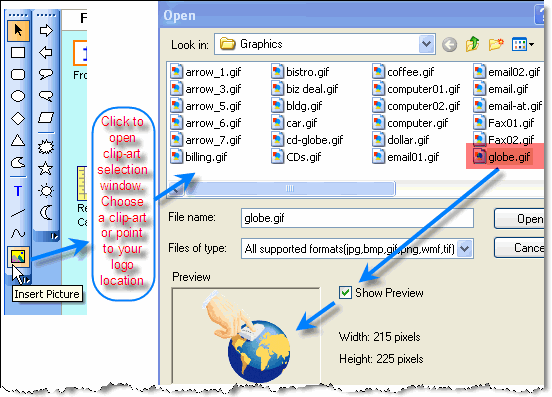
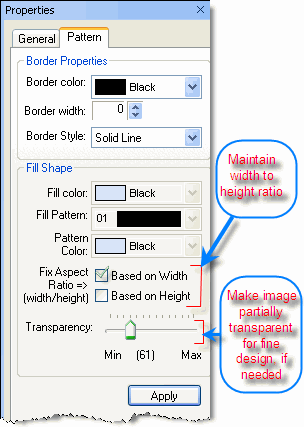
Business Card Designer Pro helps create multiple small-run card designs for different clients, events, promotions, or personal uses.

2

Select a card template and background

Use File > New to open the New Card Template window. Choose a template, optional background, and a card size. The card-size dropdown includes common horizontal and vertical sizes, and you can also choose a custom size.

After selecting the starting design, edit the text and artwork to make the card your own.

3

Choose card size, orientation, and sides

Business Card Designer Pro supports one-sided, two-sided, horizontal, and vertical business cards up to 5 x 5 inches. Choose a standard size from the list, select a vertical template, or use Other to enter a custom size in inches or centimeters.

4

Add or update text

Select the Text tool or use Insert > Text. Click or drag on the design area to place the text element, then use the properties area to update the text, color, font, rotation, transparency, and related settings.

5

Add your logo and clip art

Use the Picture tool or Insert > Clip-Art to add a company logo, product photo, or other graphic. After inserting the image, drag it into place and adjust size, position, tilt angle, aspect ratio, and transparency from the properties area.

The legacy software supports common formats such as JPG, GIF, BMP, TIFF, PNG, and WMF.

6

Add ready-made shapes

Insert rectangles, rounded rectangles, circles, diamonds, triangles, arrows, callouts, stars, and other shapes from the shape bar or Insert menu. Double-click a shape to change pattern, color, size, tilt angle, and other properties.

Partial transparency lets design elements overlap while still showing objects underneath.

7

Save or print your card

After finishing a card, save it as an image for email or print-shop use, save the project as a BCF file for later editing, or print directly to a Windows-compatible printer.

Use File > Save As Image for JPG, GIF, BMP, or PNG output, with high-resolution options up to 600 DPI. Use File > Print to control pages, rows and columns, gaps, margins, crop marks, and corner marks. Use Print Preview before printing.

Ready to try it?

Download the classic trial, view screenshots, or see sample cards created with Business Card Designer Pro.